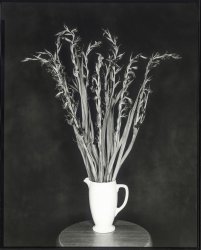
5x4 Contact Printing

I just love to contact print my 5x4 negatives. all my Laos's images are exhibit only in contact print. It adds some smoothness that doesn't exist in enlarged prints IMO.

If you do contact sheet of your sheet films, you can have yet a god idea of how it works when contact printing, it's defitively easy, let's have a try.
 
The vast majority of my prints over the past number of years (since my retirement) have been 'contact' prints.. but then it is because I have mostly been printing in the 'archaic' non-silver processes. I am not adverse to digitally 'enlarging' 4x5 negatives onto 8.5 x 11 inch Pictorico to use as a negative under my home-made UV fluorescent light-box. But... as I 'age', I find I am less appreciative of anything printed an 'image area' larger than 11x14 when printed on 'commercial' paper... partly because I don't have the wall space or 'room for the correct viewing distance'. I believe there is something 'sweet' about an 8x10 inch Pictorico negative area printed (with an inch or so of the 'emulsion' showing around the image area for a 16x20 inch frame. I guess I'm following the beliefs of my mentor those many years ago... "Bigger is NOT always better". He enjoyed seeing those viewers getting what he termed 'up close and personal' with his prints.

Ken
 
Last edited:
Hello Alan9940. In your experience.... Lupex and Lodima papers are completely different at least in terms of the kind of negatives that work well with either? Which means Lupex and Azo are also different in the same way. Both Azo and Lodima require very dense negatives but in your findings Lupex does not? I have had countless negatives that print well on Azo G2 and G3 but heaven forbid I tried to use an enlarger on them. You could barely make out anything on the negative. The only way to print them was with a 200 or 300 watt bulb. I am curious to know why Lupex is touted as an Azo replacement and yet can be printed as if it was an enlarging paper. Cheers, Francesco. PS. I am hoping that Lupex is indeed an Azo look alike (wishful thinking?).
 
.... I am curious to know why Lupex is touted as an Azo replacement and yet can be printed as if it was an enlarging paper. Cheers, Francesco. PS. I am hoping that Lupex is indeed an Azo look alike (wishful thinking?).

I received my first box of Lupex yesterday, previously I had been using up stocks of Fomalux. I have never used Lodima or Azo, but initial experience indicates that Lupex could not be used as an enlarging paper - it's very slow compared to Fomalux.
A print from an 8x10 negative on Fomalux required 10 seconds exposure whereas the same negative on Lupex required 210 seconds, all other conditions & processing being equal.
Other than that, I find Lupex almost identical in appearance and contrast to Fomalux, perhaps a slightly cooler image tone and fractionally less contrast. Scan of untoned Lupex print attached.
More tests soon.

2022-04-07-0001.jpg
 
very nice Roy. Are you getting the paper from the UK or does it have to be imported
 
Made my first few contact prints and had a great time. The first 2 were negatives I had developed in Pyrocat-HD - they are very 'thick'. They refused to print with cyanotype so I rigged up an old electronic flash pointed at the ceiling and printed them on Ilford RC multigrade.
Bingo! Worked well, adequate prints, and I thought 'ok, I've got this'.
Next set of negs were developed in Bellini Hydrofen and a bit thin. They printed okish but the results are flat, lacking contrast and downright dull.
I really enjoy contact printing, and don't have room for an enlarger, so I'll keep going. Have just learned that current Ilford multigrade may need a different set of filters than the older types - and none of it is designed for my old flash either.
Am considering investing in some Adox Lupex and a light bulb. Will be quite an investment as Lupex 5x7 only comes in 100 sheets packs.
OR maybe I should just find some Ilford filters to add to the many diffusers taped over my flash.

Would anyone like to sell me a smaller quantity of Adox Lupex 5x7, or split a box with me?
Or
Can anyone advise in the crazy question of which Ilford filter to tape over my flash gun next :D.

('Boring' print included below. Yes, that's a light leak too - my world is full of them. Have decided I like this camera so it's about to get some serious restoration and smart new set of bellows)

Wendy
 

Attachments

  • goringfollybridgecontact.jpg
    goringfollybridgecontact.jpg
    358.2 KB · Views: 23
Last edited:
The only reason I can think of for a thick negative is to compensate for a too bright light source. I never had problems when I first started making prints (by contact, as I didn't have an enlarger).

I have a sheet of glass in my darkroom which is used for contact printing 6x7 negatives onto 10x12 (I think) paper so as to get the film film on one sheet. I will admit that since my contacts are only for filing and judging which to enlarge, I'm not bothered about technical perfection so much as just getting a recognisable image and am prepared to pull the paper if I overexpose; but the negatives per se aren't a problem.

The only reason I can think of for a thick negative is to compensate for a too bright light source. I never had problems when I first started making prints (by contact, as I didn't have an enlarger).

I have a sheet of glass in my darkroom which is used for contact printing 6x7 negatives onto 10x12 (I think) paper so as to get the film film on one sheet. I will admit that since my contacts are only for filing and judging which to enlarge, I'm not bothered about technical perfection so much as just getting a recognisable image and am prepared to pull the paper if I overexpose; but the negatives per se aren't a problem.
I do the same, enlarger as a light source, piece of glass with the negative in the middle sheet of 5x7 paper on the bottom, if I wanted them framed or if I was giving the print away, I would simply trim the pape
 
I don't mask the paper . . . yet. Right now I'm printing 5x7 negs on 5x7 paper and putting up with the black bands from the film holders.

Masking would be a good idea because those black edges show every tiny bump and bend from the developing trays and tongs. White borders would be more forgiving and would cover those black bands.
 
You'll find lots of posts in various forums suggesting use of rubylith to mask contact prints for white borders. In my experience, there are two problems with that. First, the thickness of the mask impedes good contact of negative to paper, particularly around the edges of the image area, resulting in unsharpness. Second, it's difficult enough for me to keep a negative and same-size paper lined up in a contact frame. Piling on the additional complication of precision alignment with masking on the glass motivates pulling out what remains of the hair on my head.

I've wondered whether at least the first issue could have been dealt with if that extremely thin metallized masking tape for glass mounting transparencies were still available. Unfortunately, it's long gone.
 
This masking things are real tasks.
First I have learned not to struggle anymore with the alignment of a mask.
I just "through" the negative onto a bigger than needed paper and cut it later to an aligned size.

I also have found that I need a glass plate for good contact between neg and paper so to me everything between will rob my sharpness.
Now I bought a big glass plate with a size that covers the whole baseboard of my Durst 138 Laborator.
Next I want to build something with hinges connecting base board and glass because I don't want to lift the huge glass plate.

Probably a mask on top of the glass will give unsharp boarders to the image, but I will try this first.
If no succes as expected I will spray black frames to the glass plate and then have to buy glasses of different sizes for printing different sizes.
 
For ordinary film and paper, why not using something the old print frame depicted below. Sandwich the film and paper on the inside of the frame and lock into place in the usual manner. Turn the frame over and place a mask on top of the glass in the appropriate location before exposing.

1681011557644.png
 
Use thin black card or paper. Cut out a hole that exactly fits your neg. Now cut another that is a few millimetres smaller all round, depending on the size of border you need. Align them carefully and hinge them together. Mount the whole thing on another piece of black card, preferably more rigid. Now you need a sheet of glass with polished (or at least de-burred) edges, to put on top.
The neg can be located into the lower aperture by feel. Clean dry hands please.
You will need a new scalpel blade, a proper cutting board and a few simple tools, none of them expensive.
 
Turn the frame over and place a mask on top of the glass in the appropriate location before exposing.

If my tests with top mounted frames to the glass will give sharp borders I definitively will built a contact frame.

David, your technique sounds great.
If I translated well there remains some space between the surface of the nagative ( in my case often paper negatives) and the glass?
 
You have to choose quite thin card for the middle, positional layer. Perhaps paper would be a better description.
 
Concerning sharpness I already had bad results with the simple constellation "paper/ negative/ glass" without being anything inbetween but without squeezing the remaining air out of the whole setup.
That's why I always give final pressure with a towel to the glass, and why I probably will end with a vacuum system.
 
Do you have a diffuse (eg: flashgun pointed at ceiling) or a point source of light? Perhaps directly under the enlarger? Weston had a single bulb directly over the holder, but no vacuum. Is your glass heavy enough? Is your sandwich always emulsion-to-emulsion? A final press seems sensible.
 
Size could matter for contact printers.
I don't know if Weston made large contacts up from 12x16" .

I print everything under my enlarger, also contact prints.
Yesterday with opal bulb and condenser which is called directed light.
Today with LED light instead which in my construction could be described as a point source of light with a diffusor in front.

With doubleside xray film I always found it difficult to print emulsion to emulsion :)
But yes, I am ware of this rule.
My former glass hasn't been heavy enough, and my Foma paper straight from the roll is curly like a metal spring.
But even if my printing pack obvisiously lies flat it is able to feel the remaining air escaping after pressing the glass.
Our fingertips really have great sense.
With air the sheets will slip/glide if pressure is given. Not so if the contact is good.

Now with its weight of 7Kg my glass is fine but I will continue pressing it down to the neg and paper.
There is alsways some air between two sheets and a glassplate.
 
Back
Top